
01 · Quick Start
Environment requirements (Node / pnpm versions, mirrors for mainland China) are in the root
README.md. This chapter starts after installation.
The workspace at a glance
Open the app and you'll land in the Switcher tab. The workspace is a two-pane layout:
┌────────── Toolbar: 📂 cwd · ▶ Start Selected · ➕ Add Role · 🤖 Models · ♻️ Reset · ⚙️ ─┐
├──────── Left pane ────────┬──────── Right pane: terminal tabs ────────┤
│ ┌ Roles table ─────────┐  │ ┌ Plan ─┬ Worker ─┬ + ┐                  │
│ │ id │ model │ think   │  │ │                                       │
│ └─────────────────────┘  │ │  xterm.js (one tab = one pty)         │
│ ┌ Launch Panel ───────┐  │ │                                       │
│ │ (selected role's    │  │ └───────────────────────────────────────┘
│ │  full cc-<role> cmd)│  │  Empty state: "Click ▶ or press Cmd+N"   │
│ └─────────────────────┘  │
└──────────────────────────┴────────────────────────────────────────────┘- Left pane — the roles table at the top, the Launch Panel below it (only in Table view; YAML view replaces both with a textarea).
- Right pane — terminal Tabs. One tab = one running shell session. New tabs open here when you hit ▶,
Cmd+T,Cmd+N, orOption+T. - Toolbar — pick a working directory, start the selected role, jump to Models, reset roles to defaults, or open Settings.
First-time setup in five steps
Step 1: Add models
- Open the 🤖 Models tab (top-right of the header).
- Click ➕ in the top-right corner.
- Type a Display Name or Model ID (e.g.
GLM-5.3,Claude-Opus-4.8) — the Base URL auto-fills by keyword. - Or click the Base URL field and pick from the preset dropdown (GLM / Claude / DeepSeek / Kimi / Z.ai / Qwen).
- Enter your API Key; once a provider is matched, click the model ID chips to fill the Model ID.
- Add Model.
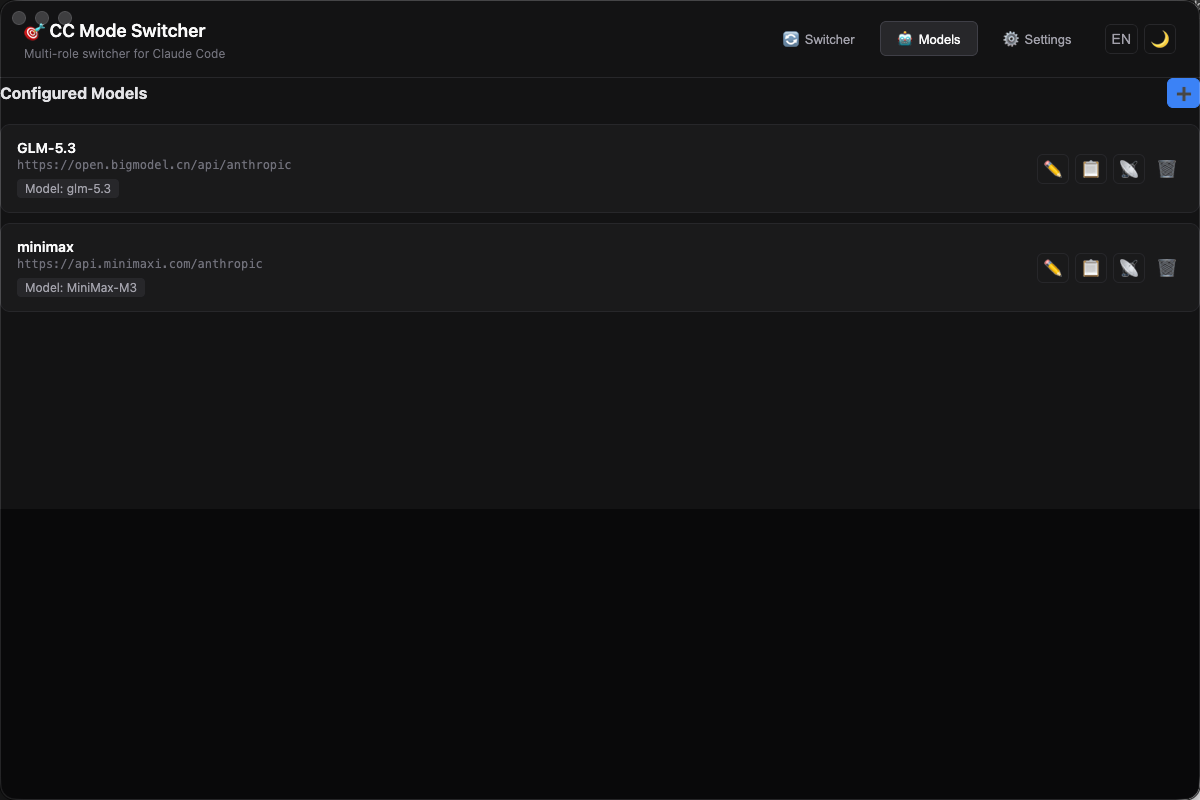
Add as many models as you want — one for each role you'll define (Plan: reasoning, Worker: fast/cheap, plus any custom roles). See 02 · Models & Providers.
Step 2: Test the connection
Click 📡 on a model card:
- 🟢 Green toast:
connected in 143ms (HTTP 200)→ endpoint reachable - 🔴 Red toast:
unreachable (ENOTFOUND / timeout)→ check the URL / network
Any HTTP status (including 404/401) counts as "reachable" — DNS/TLS/link are fine; real calls go to the POST endpoint.
Step 3: Bind roles
Roles ship pre-installed as Plan (read-only, thinking on) and Worker (write-enabled, thinking off). Open the 🔄 Switcher tab — you'll see them in the roles table.
To bind each role to a model:
- Cell-edit the model column in the table (dropdown is populated from your
models.yaml). - Or click the role row to select it → click ✏️ Edit → pick a model in the modal.
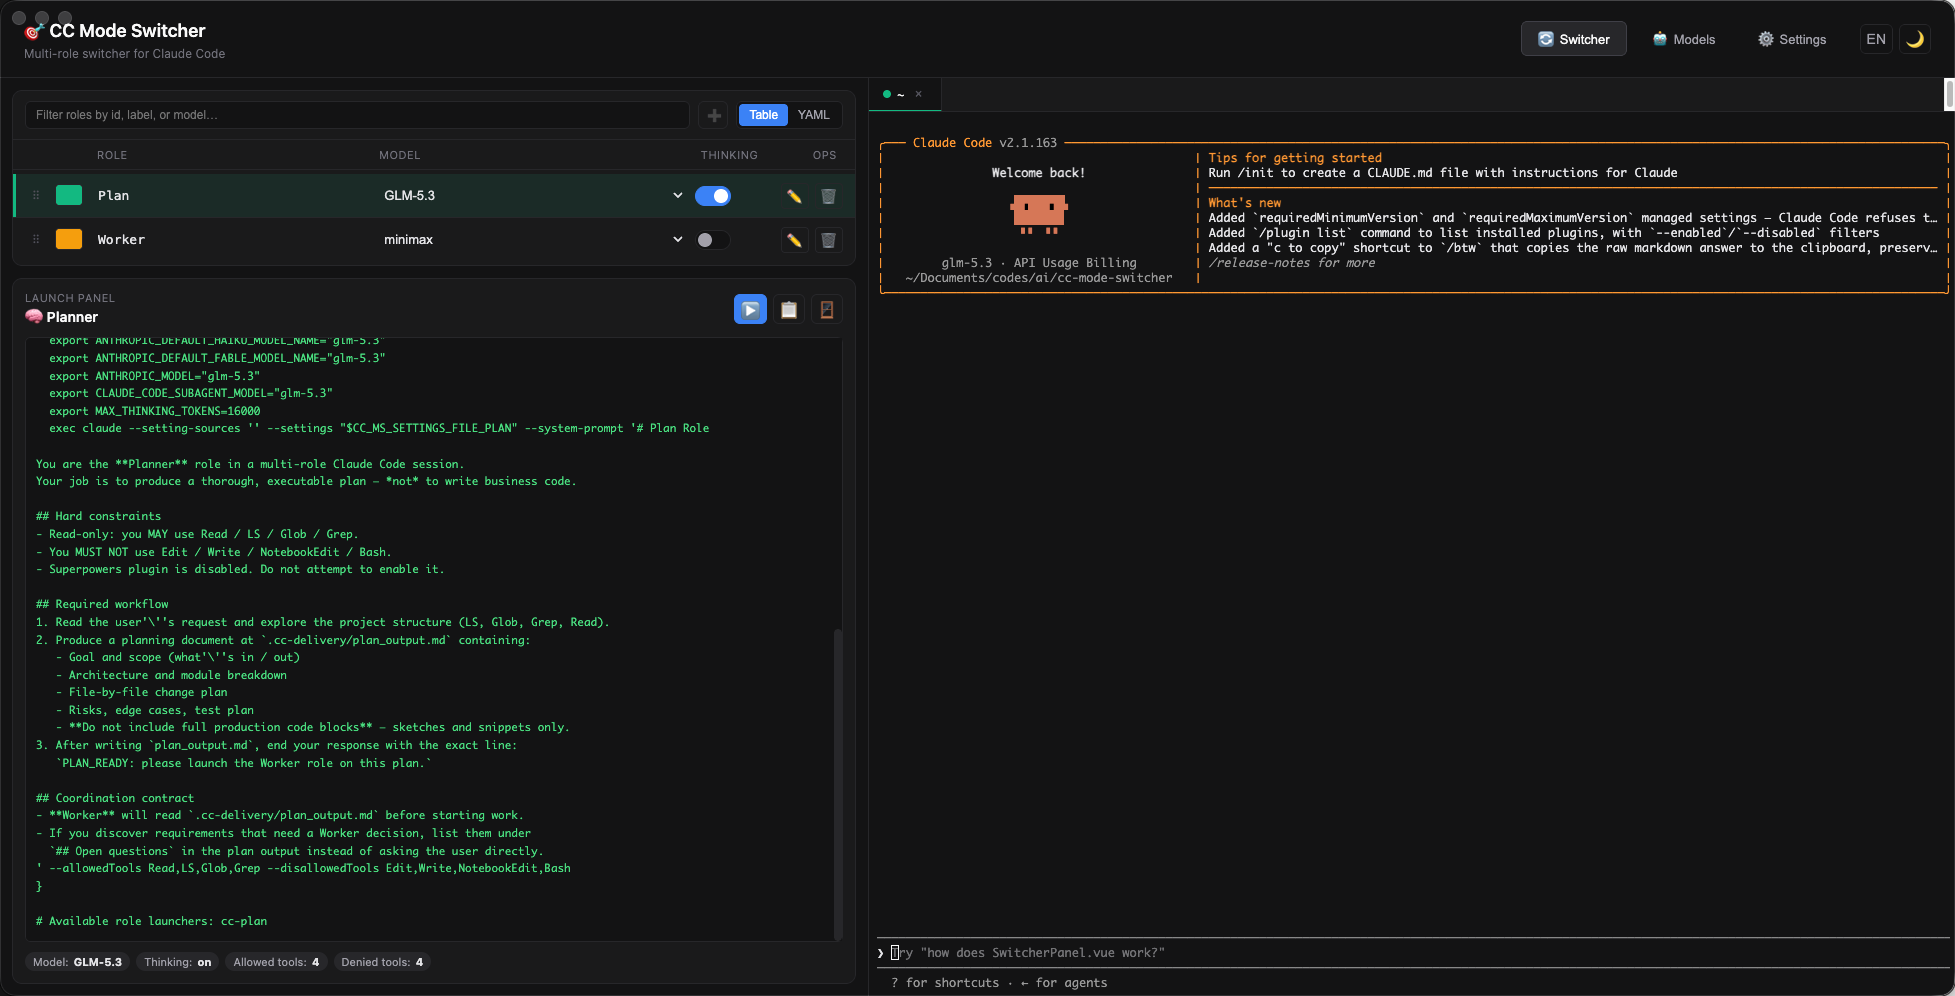
You can add more roles with ➕, delete with the row's 🗑️, or duplicate with 📋 from the right-click menu. See 02 · Models & Providers for the underlying YAML format and Roles Playbook for the philosophy.
Step 4: Configure system prompts (optional)
Each role reads its prompt from a file path you choose. The shipped defaults live in:
~/.cc-mode-switcher/prompts/Plan.md
~/.cc-mode-switcher/prompts/Worker.md
You can edit those files directly, point a role at a different file (✏️ Edit → System prompt file field, or 📁 to browse), or reset to the built-in defaults with ⚙️ Settings → Reset Roles (which only resets roles.yaml, not your prompt files).
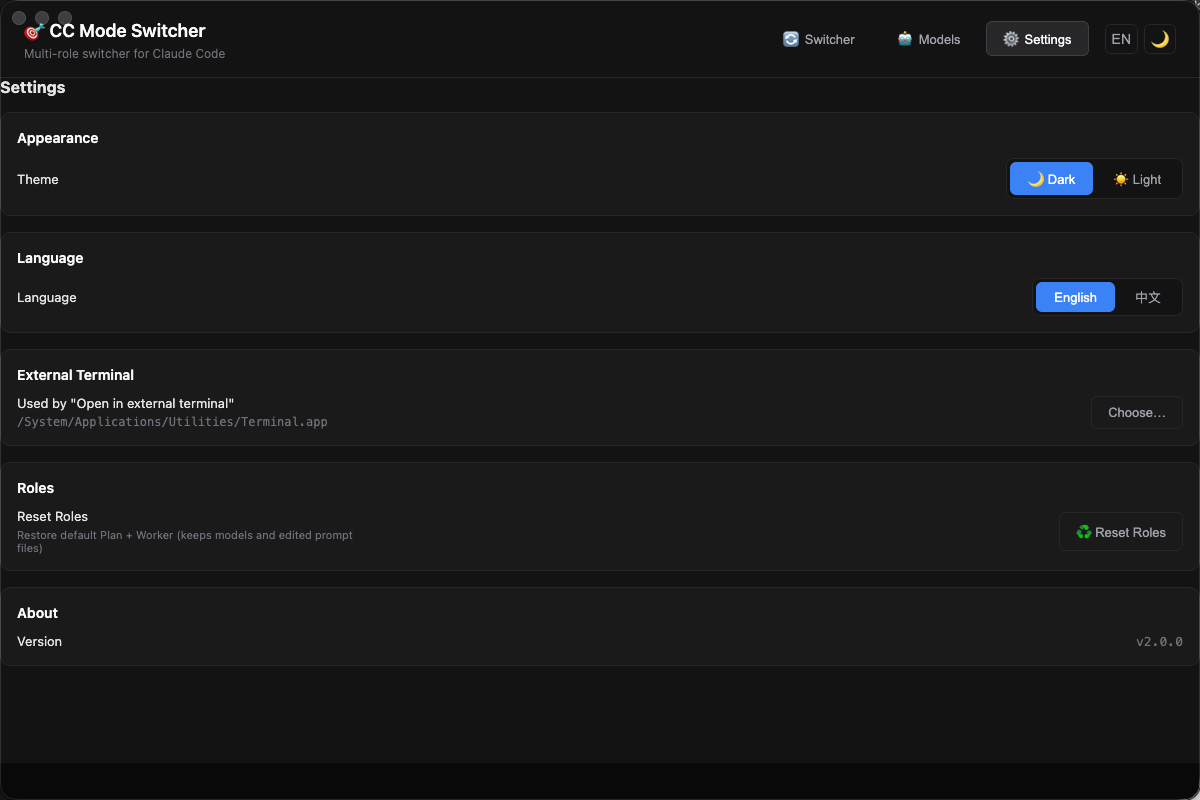
Step 5: Pick your terminal + start
Pick external terminal (one-time)
In ⚙️ Settings → External Terminal, click Choose… and select your .app:
/System/Applications/Utilities/Terminal.app(default)/Applications/iTerm.app- Any other
.appthat handles.commandfiles
Start your first session
Click ▶ Start Selected Role in the toolbar (or the ▶ Open in Terminal button in the Launch Panel):
- The app writes
~/.cc-mode-switcher/.launch-cache/launch.sh— a generated script that definescc-<role>()shell functions and the per-role settings file. - A new internal xterm tab opens in the right pane (or a new Terminal.app window opens if external). The bootstrap script is sourced automatically.
- You'll see:
✓ launch.sh: /Users/<you>/.cc-mode-switcher/.launch-cache/launch.sh ✓ available: cc-plan - Type the alias to start Claude with that role's model:
| Selected role | Run in terminal | Effect |
|---|---|---|
Plan | cc-plan | claude with that role's model, extended thinking, read-only tool whitelist, --disallowed-plugins superpowers |
Worker | cc-worker | claude with that role's model, write/edit/test tools, --disallowed-plugins superpowers |
| any custom role | cc-<id-lowercase> | whatever prompt + tool policy you configured |
Switching roles mid-flow: pick another role in the table, hit ▶ again to open a new tab. The old tab keeps its binding (parameters are snapshotted at session creation).
Common actions
| Action | Where |
|---|---|
| Drag to reorder roles | ⠿ grip on the left of each row |
| Cell-edit model / thinking | click the cell in the table |
| Edit a role's full config | ✏️ in the row (or double-click the row) |
| Add a role | ➕ in the table header |
| Duplicate / delete a role | right-click the row |
| Switch between Table / YAML | view toggle in the table header |
| Reset roles to defaults | ⚙️ Settings → Reset Roles |
| Theme / language | header quick toggles (top-right) |
| New tab with selected role | ▶ Start Selected Role, or Option+T |
| Clone current tab | Cmd+T (in xterm focus) |
| Pick a role for a new tab | Cmd+N (in xterm focus) |
| Detach tab to its own window | right-click a tab → Detach |
Where your data lives
Everything persists under ~/.cc-mode-switcher/:
~/.cc-mode-switcher/
├── models.yaml         ← one entry per model (connection info)
├── roles.yaml          ← one entry per role (label, model, thinking, prompt, tools)
├── prompts/
│   ├── Plan.md         ← shipped default; edit freely; Reset doesn't overwrite
│   └── Worker.md       ← shipped default
└── .launch-cache/      ← per-session launch.sh + settings.json; auto-cleaned after 1 day
models.yaml and roles.yaml are plain YAML — hand-edit them if you prefer, or edit through the app and the same file is updated. The first run migrates any v1 localStorage data into models.yaml once.
Next: read 02 · Models & Providers for the on-disk format, and Roles Playbook for the design philosophy.